This guide is designed to help you understand how to add a post, page, category or tag in WordPress for better organizing content.
Table of Contents
- Add a New Post or Page
- Make a New Category or Tag
- Create a Subcategory
- Assign Categories and Tags to a Post
Add a New Post or Page
1. Log into your WordPress dashboard (usually at yourdomain.com/wp-admin).
2. In the left menu, click on either:
– Posts > Add New – for blog entries or regular updates.
– Pages > Add New – for static content like “About” or “Contact”.
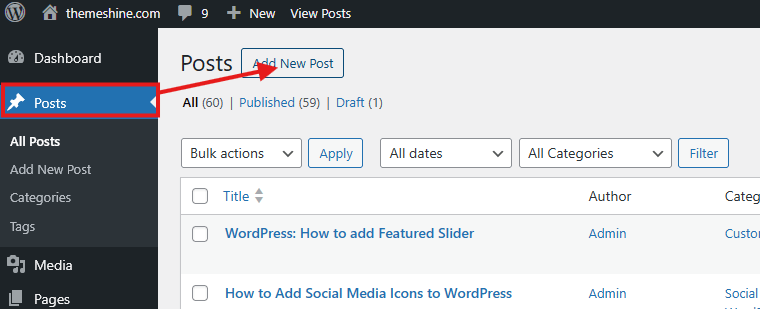
3. Enter your title and start writing your content using the block editor.
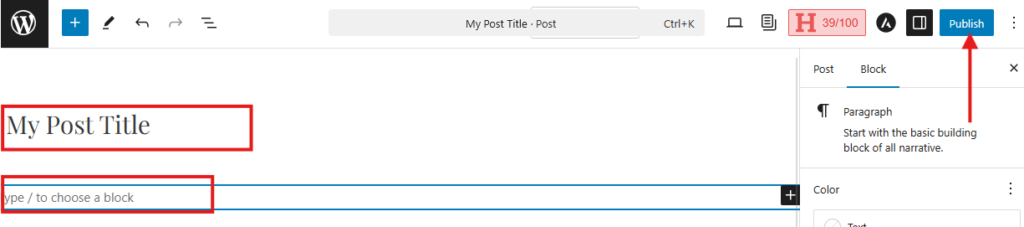
4. When ready, click Publish to make it live, or Save Draft to come back later.
Make a New Category or Tag
Categories and tags help group your posts so readers can navigate your site more easily.
To add a new category:
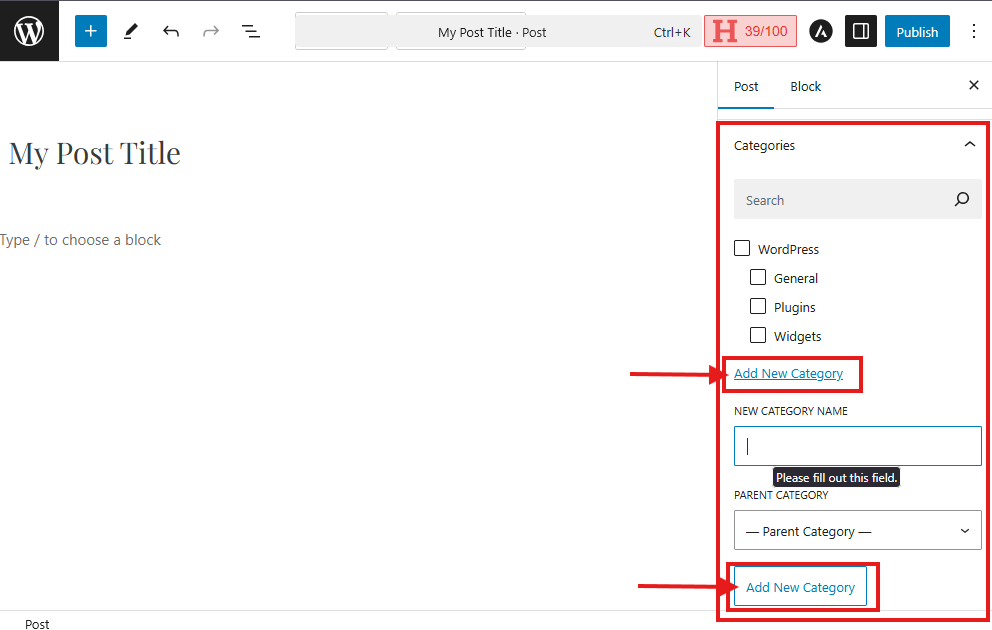
- Go to Posts and edit/create your post > select Categories.
- Click Add New Category.
- Fill in the NEW CATEGORY NAME field.
- Press the Add New Category button.
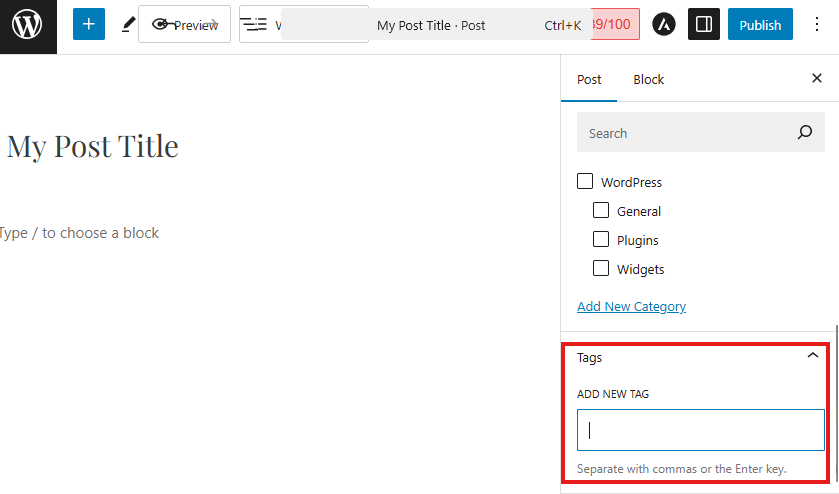
To add a new tag:
- Go to Posts and edit/create your post > select Tags.
- Enter your desired tag name.
- Press the Enter key to add it (for multiple tags, separate them with commas).
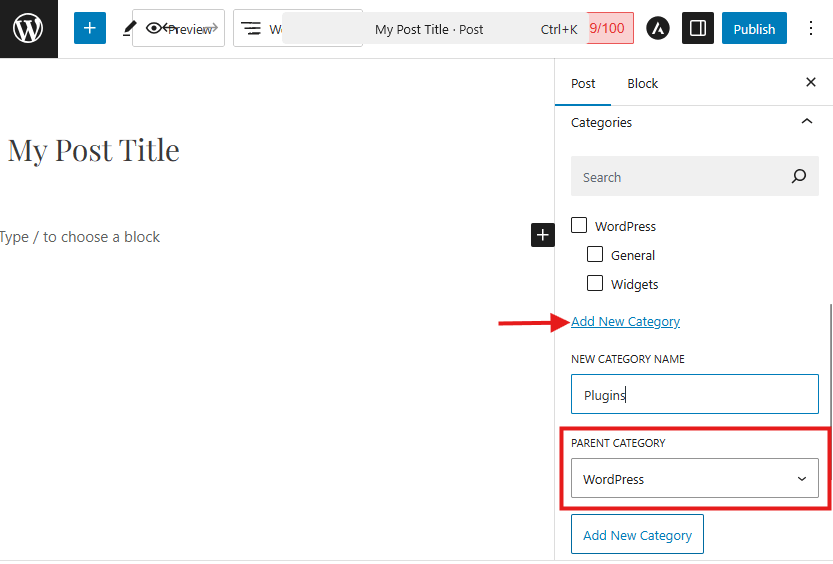
Create a Subcategory
Want to nest a category under another one? Here’s how:
- Go to Posts and edit/create your post > select Categories.
- Under the Parent Category dropdown, choose the main category you want it to be grouped under.
- Fill in the Name for your subcategory.
- Click Add New Category to finish.
Assign Categories and Tags to a Post
There are two main ways to add categories or tags to your post:
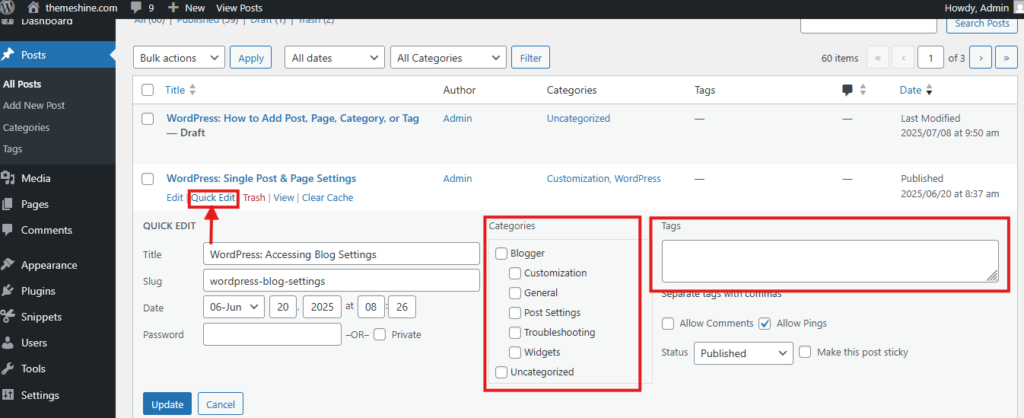
Quick Edit from the post list:
- Go to Posts > All Posts.
- Hover over a post and click Quick Edit.
- Use the Categories checkbox and Tags text field to make changes.
- Click Update when done.
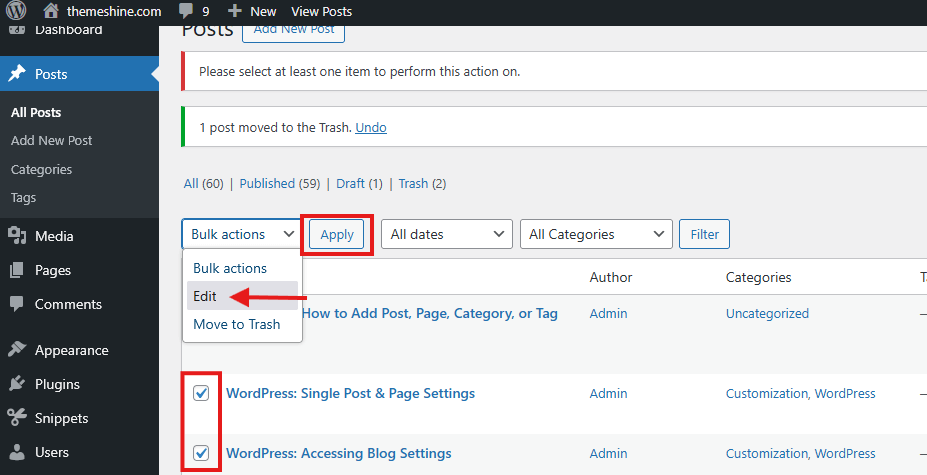
Bulk Edit
- In Posts > All Posts, check multiple posts.
- Choose Bulk actions > Edit and click Apply.
- Add or update categories and tags for all selected posts at once.
- Click Update to save changes.